How to Replace Stubborn Exhaust Pipe Flange Bolts
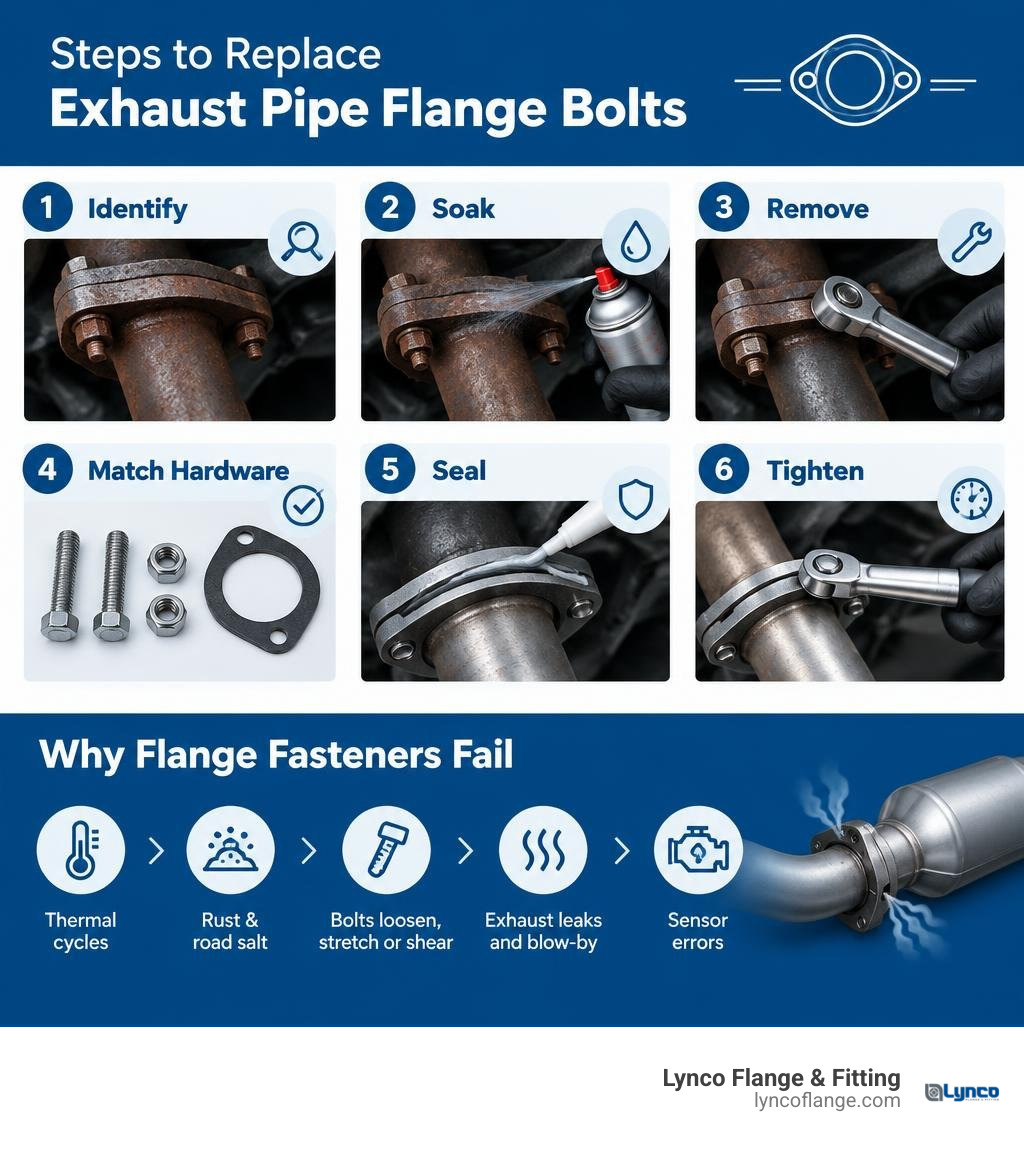
To replace exhaust pipe flange bolts, let the exhaust cool, support the pipe, and check whether the fasteners are ordinary bolts or pressed-in studs. Brush off loose rust and apply penetrating oil. If a fastener still will not move, use controlled heat only after checking for nearby fuel lines and other hazards. Fit matching new hardware and a new gasket, then tighten to your vehicle’s specified torque.
Road salt, rust, and repeated heating and cooling can make these bolts seize or break. Fixing a loose flange also helps stop exhaust noise and leaks before they affect oxygen sensor readings.
I’m Lance Vanover, CEO of Lynco Flange & Fitting. My 26 years in flange and fitting operations inform this guide to choosing and installing exhaust pipe flange bolts, though your vehicle’s service information should always determine fit and torque.
Signs and Dangers of Exhaust Flange Fastener Failure
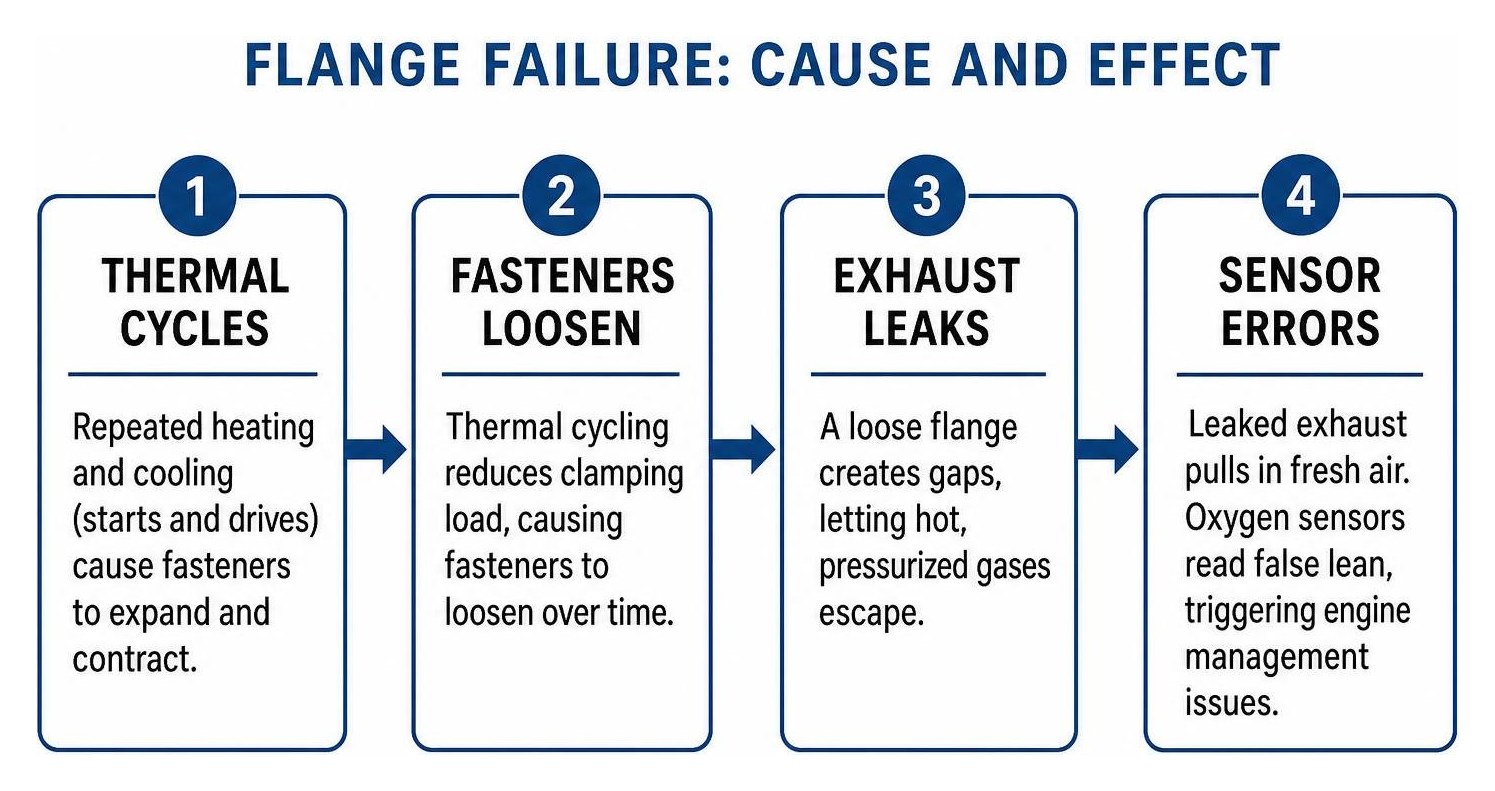
When an exhaust fastener stretches, strips, or shears clean off, your exhaust system loses its clamping load. This joint failure leads immediately to exhaust blow-by. Hot, pressurized gases escape right at the seam between the catalytic converter, header, downpipe, or intermediate muffler connection.
You will usually hear the failure before you see it. A damaged flange connection emits a sharp, rhythmic ticking or tapping noise upon cold start. This sound often quietens as thermal expansion temporarily closes the micro-gap, only to return as an aggressive roar under heavy acceleration. If the gap widens significantly, your exhaust might start sounding more like an old radial aircraft engine than a modern daily driver.
Beyond the noise, failing fasteners create functional and safety problems:
- False Oxygen Sensor Readings: When exhaust pulses pass a compromised joint, a scavenging effect draws fresh ambient air (oxygen) backward into the pipe. The upstream or downstream O2 sensors register this extra oxygen as a false lean condition.
- Engine Management Imbalance: Confused by false lean readings, the engine control unit (ECU) dumps excess fuel into the cylinders. This creates fuel trim imbalances, fouls spark plugs, lowers fuel economy, and can overheat and melt catalytic converters.
- Cabin Fume Infiltration: Exhaust gases contain carbon monoxide, unburnt hydrocarbons, and nitrogen oxides. Escaping gases under the vehicle cabin easily enter the passenger compartment through ventilation floor pans.
- Loss of Scavenging Velocity: Unwanted pressure drops disrupt exhaust gas scavenging, degrading low-end torque and overall engine response.
Recognizing these symptoms early helps you troubleshoot joint degradation. Understanding the 5 common flange problems and how to troubleshoot them helps pinpoint whether your issue stems from joint alignment, gasket degradation, or sheer fastener fatigue.
Identifying Your Exhaust Pipe Flange Bolts and Hardware
Before grabbing wrenches and cutting wheels, inspect the connection to see what style of hardware the manufacturer originally installed. Automakers use several distinct configurations:
- Standard Through-Bolts: These feature a hex head bolt passing through unthreaded holes in both mating flanges, secured on the back with a standard or locking hex nut.
- Threaded Flange Studs: One flange ear has machine-cut internal threads. A double-ended stud threads permanently into the flange, while the mating exhaust pipe slips over the stud and clamps down with a nut.
- Splined and Pressed-In Studs: Common on many truck platforms (such as GM dual-catalytic converter assemblies), these fasteners feature a knurled or splined shoulder just beneath a rounded mushroom head. They are pressed mechanically into unthreaded flange holes from the factory and do not spin when torqued.
- Spring-Loaded Flange Bolts: Frequently used on flexible ball-and-socket joints, these fasteners incorporate heavy-duty compression coil springs between the bolt head and the flange face. This setup allows the exhaust system to flex under engine movement without fatiguing the piping.
Use a wire brush to scrape off surface scale, then verify whether you are dealing with imperial or metric hardware using a manual thread pitch gauge or calliper.
Step-by-Step Guide: How to Remove Seized Exhaust Pipe Flange Bolts
Exhaust fasteners live in one of the harshest environments on any vehicle. They endure operating temperatures climbing past 600°C (over 1100°F), road salt, moisture, and cyclic vibration. Removing them requires patience, proper safety precautions, and the right approach.
Before beginning mechanical work:
- Disconnect the vehicle battery if you plan on welding near the chassis.
- Wear wrap-around eye protection, heavy leather work gloves, and long sleeves.
- Fire Safety: Always have a fully charged fire extinguisher nearby. Inspect the entire area within two feet of the flange for plastic fuel lines, fuel tank vents, brake lines, electrical harnesses, or undercoating overspray.
- For motorcycle systems requiring strict OEM alignment steps, consult factory literature like the Sportster exhaust installation specifications to avoid damaging fragile cylinder head exhaust ports.
Step 1: Pre-Soaking with Penetrating Fluid
Never attack a dry, rust-frozen exhaust bolt with an impact gun on maximum reverse—you will almost certainly snap the bolt head off.
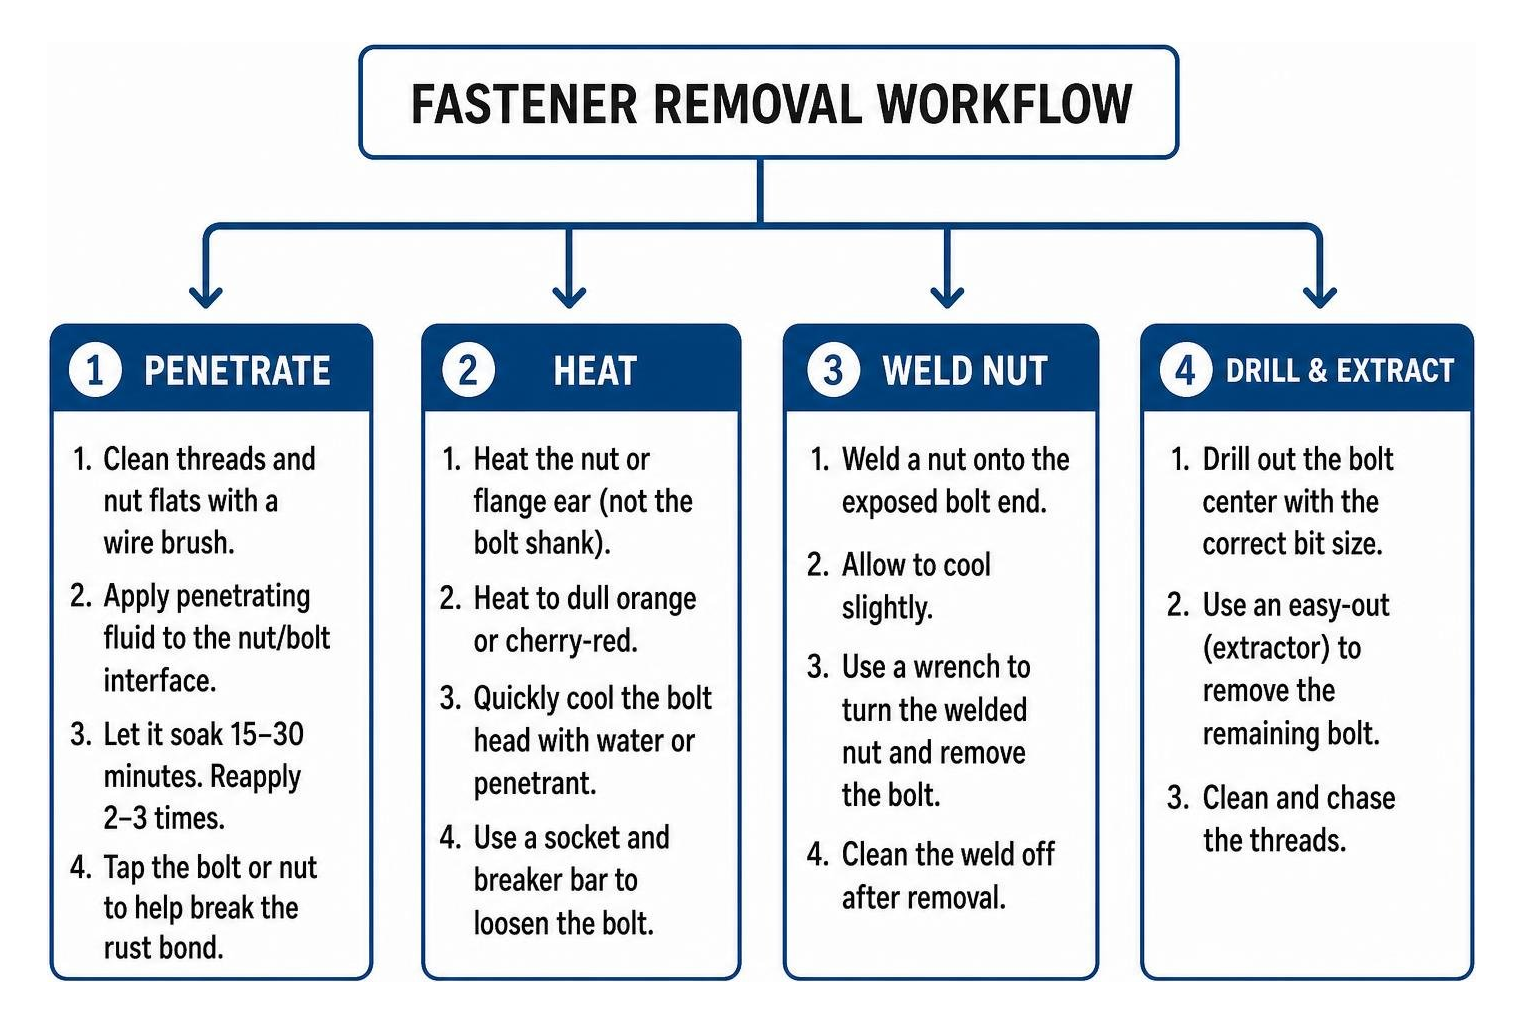
- Mechanical Descaling: Use a coarse stainless steel wire brush or a wire wheel on a cordless drill to strip thick iron oxide flake from the exposed bolt threads and nut flats.
- Apply Penetrant: Spray a high-grade penetrating fluid formulated for high-rust dissolution directly onto the interface where the nut meets the bolt threads, as well as beneath the bolt head.
- Patience and Reapplication: Allow the chemical penetrant to wick into the microscopic gaps for at least 15 to 30 minutes. Reapply 2 to 3 times for heavily oxidized fasteners.
- Impact Shocking: Gently tap the end of the bolt or the side of the nut using a small brass hammer or an automatic center punch. These micro-vibrations help break the internal rust weld, allowing the fluid to draw deeper into the threads.
Step 2: Applying Controlled Torch or Induction Heat
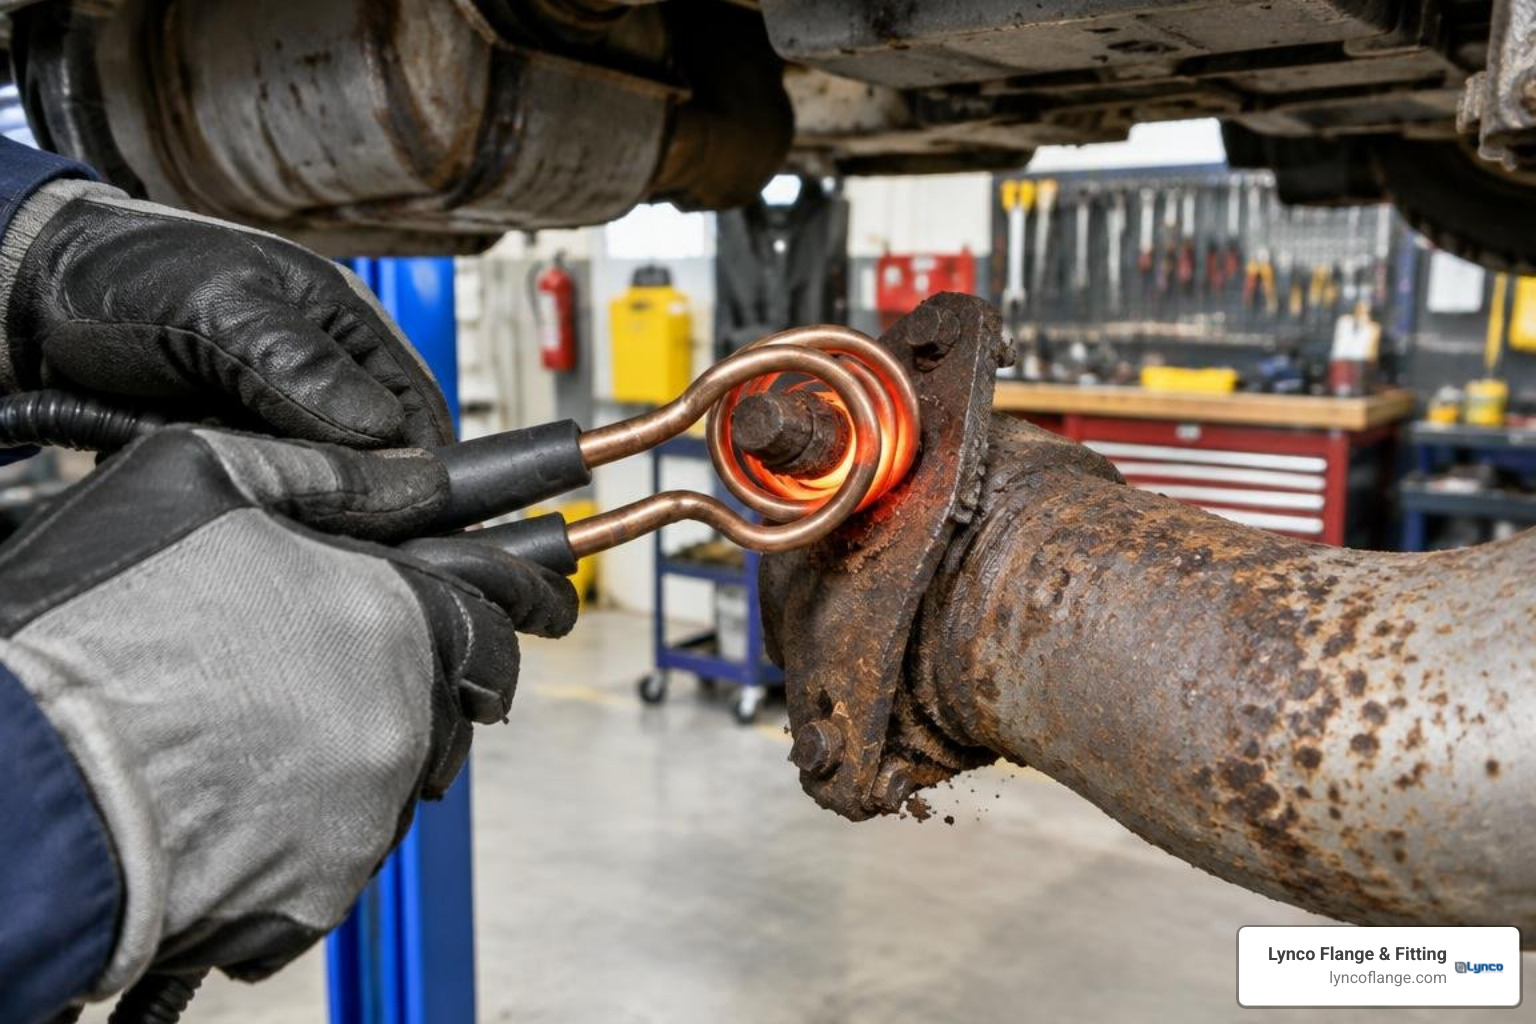
When chemical penetrating fluid alone fails, heat is your most effective tool. Applying concentrated thermal energy expands the outer nut or threaded flange ear rapidly, breaking the rust bond holding the bolt.
- Tool Choice: An open-flame oxy-acetylene or MAP-pro torch works well, but a flameless magnetic induction heater is much safer around vehicle underbodies because it heats metal without an open flame near undercoating or fluid lines.
- Apply Heat: Focus heat directly on the nut or the female flange ear, not the center bolt shank. Heat the outer fastener until it turns a dull orange to cherry-red color.
- The Thermal Shock Trick: Once heated, quickly mist the central bolt head with a squirt of water or penetrating fluid (beware of flare-ups and vapor). The sudden cooling shrinks the bolt shank while the nut remains expanded, shattering the internal corrosion layer.
- Break Free with Hand Tools: Use a snug, 6-point impact socket on a long breaker bar. Apply smooth, steady counter-clockwise pressure. If you feel excessive springy resistance that indicates the bolt is twisting rather than unthreading, turn the socket clockwise one-eighth of a turn, apply more lubricant, and work it back and forth gradually.
Step 3: Extracting Sheared or Rounded Fasteners
If a fastener rounds off or shears flush with the flange face, choose one of these reliable extraction techniques:
Method A: Welding a Nut (Preferred for Sheared Studs)
- Place a fresh, un-plated steel nut with an inner diameter matching the broken stud directly over the flush or protruding break point.
- Using a MIG or stick welder, aim your arc straight down into the center of the nut, puddling molten metal directly onto the broken bolt core until the nut fills with weld.
- The intense electrical heat transfers directly through the bolt core, shocking the seized threads deep inside.
- Allow the weld to cool from red-hot to dull grey (about 2 to 3 minutes), then place a standard wrench on the newly welded nut and back the broken stud out smoothly.
Method B: Drilling and Using a Fluted Extractor
- Grind the jagged broken bolt face completely flat with a die grinder or small cut-off wheel.
- Use an automatic center punch to create an indentation in the absolute dead center of the broken bolt.
- If drilling manifold flanges in tight engine bays, clamp an aftermarket alignment drill template over the flange to prevent the drill bit from walking into the softer surrounding metal.
- Chuck a high-speed cobalt left-hand drill bit (sized to roughly 1/3 of the bolt diameter) into your drill. Set the drill to reverse. As the left-hand bit cuts deep into the bolt, friction and cutting heat will often catch the fastener and spin it right out.
- If the bolt remains stuck after drilling a pilot hole, insert a straight-fluted spiral screw extractor. Tap the extractor firmly into the pilot hole with a hammer, attach an adjustable tap handle, and back the damaged core out.
Selecting and Sizing Replacement Exhaust Hardware
Never replace exhaust hardware with generic zinc-plated hardware store fasteners. Low-grade carbon fasteners quickly stretch under thermal stress, lose clamping force, and rust into a solid lump within a single winter.
Review the factors to consider when selecting pipe fittings to ensure your joint can handle elevated heat cycles, internal system pressures, and corrosive environments.
| Fastener Material / Grade | Tensile Strength | Temperature Limit | Corrosion Resistance | Best Application |
|---|---|---|---|---|
| Metric Grade 8.8 / SAE Grade 5 Steel | Medium (800 MPa / 120,000 PSI) | ~400°C (750°F) | Low (requires organic/zinc coating) | Downstream tailpipe and muffler joints |
| Metric Grade 10.9 / SAE Grade 8 Alloy | High (1040 MPa / 150,000 PSI) | ~500°C (930°F) | Medium (if coated with anti-corrosion layer) | Catalytic converter flanges, turbo downpipes |
| 304 Stainless Steel (Grade A2-70) | Medium-High (700 MPa / 100,000 PSI) | ~800°C (1470°F) | Excellent (resists road salts and wet heat) | High-moisture areas, salt-belt undercarriages |
| Solid Brass Nuts (on Alloy Studs) | Medium | ~450°C (840°F) | Superior (will never gall or rust-weld) | Turbochargers, header collector flanges |
| Copper-Plated All-Metal Locknuts | High | ~650°C (1200°F) | High (copper plating acts as anti-seize) | OEM manifold flanges, heavy industrial piping |
For European vehicle platforms, always match the manufacturer’s exact thread pitch and length, such as the standard Peugeot OEM exhaust bolt dimensions (M8 x 1.25 in 35mm length), to prevent thread stripping in cast components.
Selecting the Right Replacement Exhaust Pipe Flange Bolts
When sourcing replacement hardware:
- Metric Sizes: M8 x 1.25 and M10 x 1.50 represent the vast majority of modern automotive and light commercial exhaust flanges. M8 fasteners are common on 3-bolt collector flanges, while heavier 2-bolt flanges generally use robust M10 hardware.
- Imperial Sizes: Older domestic vehicles and heavy trucks often require 3/8-16, 7/16-14, or 3/8-24 hardware. For instance, if you have knocked out damaged splined OEM studs on an older GM truck flange, a standard 3/8-16 Grade 8 bolt drops cleanly through the original mounting hole, whereas an M10 bolt may bind and an M8 bolt leaves too much slop.
- Self-Locking Hardware: Avoid nylon-insert locknuts (Nyloc) on exhaust systems; the plastic ring melts instantly. Instead, use all-metal distorted-thread locknuts, serrated flange nuts, or copper-plated prevailing torque nuts.
Proper Installation and Sealing Techniques for Warped Flanges
Achieving a durable seal requires clean mating faces, proper gasket seating, and uniform clamping force.
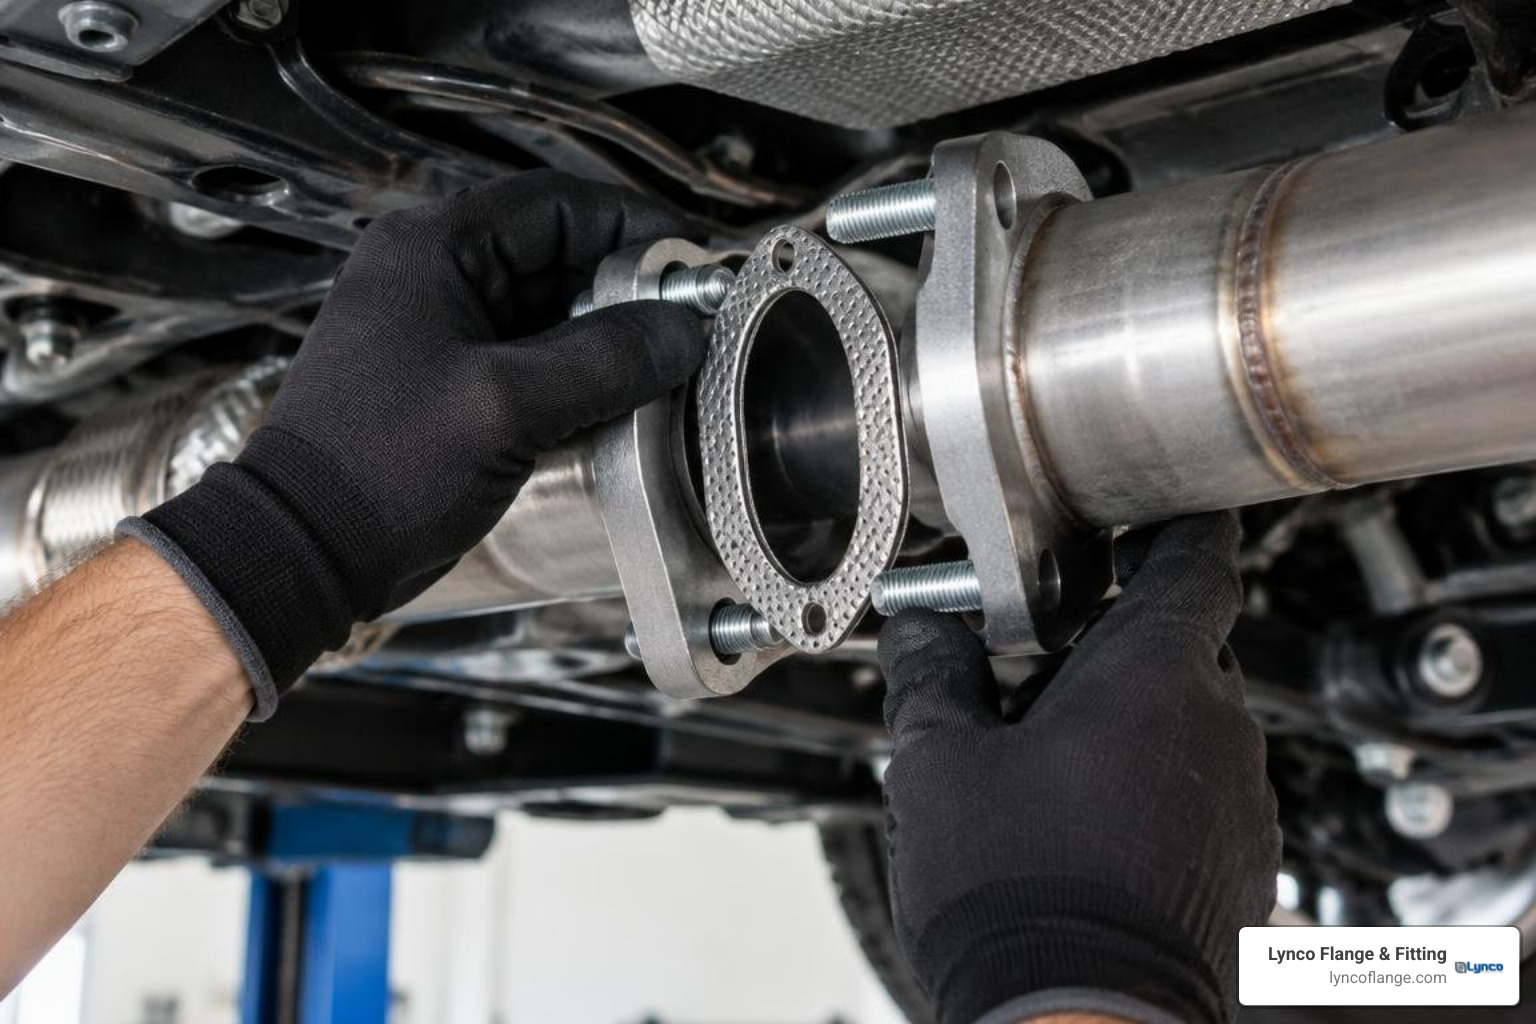
- Surface Preparation: Scrape off old, baked-on gasket material with a stiff gasket scraper or wire wheel. Clean both mating faces down to bare, flat metal.
- Checking for Warpage: Lay a precision steel straightedge across the sealing surface of both flanges. Use a feeler gauge to measure gaps underneath the straightedge. If the flange face is low in the center by more than 0.008 inches (0.20 mm), the flange is warped and will blow out standard thin gaskets.
- Correcting Flange Warpage:
- Draw Filing: If the warpage is minor, clamp the pipe securely and use a wide flat bastard file to gently draw-file the high spots around the bolt ears until the center gap flattens out.
- Custom Gasket Solutions: For stubborn gaps, skip thin paper or graphite gaskets in favor of a thick multi-layer dead-soft solid copper gasket. Soft copper compresses into deep surface irregularities, creating a dependable seal under high temperatures.
- Anti-Seize Application: Lightly coat the threads of your new bolts with a nickel- or copper-based high-temperature anti-seize compound rated to at least 980°C (1800°F).
- Tightening Pattern: Follow standardized procedures for how to properly install flanges. Install all hardware hand-tight first. For 2-bolt flanges, alternate side to side in 30% increments. For 3-bolt or 4-bolt triangular flanges, follow a star or criss-cross pattern.
- Torquing to Spec: Reference the engineering principles in how to properly torque flanges. Typical automotive M8 exhaust flange hardware calls for 20 to 25 Nm (15 to 18 ft-lbs), while heavier M10 bolts require 30 to 35 Nm (22 to 26 ft-lbs).
- Heat-Cycle Retorquing: Run the engine until it reaches full operating temperature, shut it off, let it cool completely back down to ambient room temperature, and run your torque wrench over every fastener one more time to take up any slack from initial gasket crush.
Frequently Asked Questions About Exhaust Flange Fasteners
Can you replace pressed-in splined flange studs with standard through-bolts?
Yes. Pressed-in splined studs can be removed by supporting the back of the flange ear and striking the stud tip squarely with a heavy brass hammer, or by pressing them out using a standard automotive ball-joint or tie-rod separator tool. Once popped free, the unthreaded hole accepts a high-grade through-bolt (a 3/8-inch Grade 8 bolt or an M10 Grade 10.9 bolt depending on diameter) secured with a high-temperature locknut and hardened flat washer.
What should you do if an exhaust flange is warped and leaking?
If an exhaust flange has warped significantly between the bolt holes, first attempt to draw-file the raised ears flat. If the warpage persists, install a thick, dead-soft solid copper exhaust gasket or an embossed multi-layer steel (MLS) gasket capable of sealing uneven gaps. On heavily warped, oversized rectangular flanges, some technicians drill an extra center bolt hole through both mating flanges to provide middle clamping load. If these solutions fail, cut off the warped flange and weld on a fresh, precision-machined replacement flange.
Why do stainless steel exhaust bolts seize or gall during removal?
Stainless steel alloys naturally develop a transparent, protective chromium oxide film that gives them corrosion resistance. However, when a stainless bolt and nut are tightened or untorqued dry without adequate lubrication, friction wears away this oxide layer. The bare metal crystal points shear and micro-weld together—a process called thread galling. To prevent stainless fasteners from seizing permanently, always apply high-temperature nickel-based anti-seize paste to the threads during installation, or pair stainless steel studs with copper-plated or brass nuts.
Conclusion
Exhaust flange fastener maintenance does not have to end in broken drills, stripped threads, or loud leaks. By preparing the joint with penetrating fluid, using controlled thermal expansion when loosening stubborn bolts, and replacing worn hardware with proper high-temperature fasteners, you can achieve a clean, leak-free seal that lasts.
At Lynco Flange & Fitting, our Houston-based engineering and sales teams have spent decades supplying industrial piping components, heavy-duty flanges, and specialty hardware to the oil and gas, power generation, marine, and construction industries. Whether you are troubleshooting high-temperature thermal cycling or specifying components for severe-service industrial piping systems, we provide the technical guidance, ISO-compliant quality control, and inventory you need. Contact us today to learn more about our complete selection of industrial flange and fitting solutions.